
How to Design Your First High-Res eLearning Course
It’s a frustrating and all-too-familiar conundrum: In order to learn some job skills, “you just have to be there.” Yet in most situations, a new hire can’t simply be plugged into a job and expected to pick it up on the fly. For a complicated task, a written manual doesn’t cut it – employees require thorough and immersive training.
Employers, by the same token, require training programs that allow them to finely customize courses, explain procedures in intimate detail, and measure their employees’ learning progress. For a busy company, creating effective training courses can feel like an overwhelming challenge. Where do you even start?
It’s a challenge, but it doesn’t have to be an ordeal. In this article, we will explain how to create your first course, using new High-Res eLearning technology developed by Klixel8. We’ll also review a few basics about creating successful employee training courses.
Basics of Effective Training Courses
On-the-job training is one of the essential ingredients in a company’s success, across every industry. Everything from operational safety and regulatory compliance to productivity and worker retention are impacted by your workforce training programs.
Creating eLearning courses for your company is an investment. But is proven to be well worth the time and resources.
Why? Employees who are well trained are more self-directed, confident, and happier – ultimately resulting in less turnover and lower costs associated with the training process itself. The active ingredient in this recipe, however, is “well trained.”
Effective training courses are:
1. Goal-oriented
What is the goal you hope to achieve with an online course or training program? Successful company training is designed to address the gap between the goals of your business and the knowledge base and behaviors of your workers. It might sound a bit abstract, but how you approach course planning can make the difference in whether you achieve your objectives or just keep your employees busy.
Before you do anything else, take some time to hone in on your objectives. Is it to improve productivity? Introduce a new technology or product line? Better comply with safety and regulatory standards?
Once you have a clear idea of what business goals you’d like to accomplish, you can begin building your learning modules around actionable steps to get there. Beginning with the end goal in mind makes the design phase much more straightforward. It also makes measuring your learners’ progress more concrete.
Planning goal-oriented courses is a little like planning a vacation. Say you want to drive to a beach resort six hours away. What are your first steps? Probably you pull up a map and a calendar, then start looking at hotel booking options. Probably you do not start by mapping out each gas station you’ll stop to fill up your tank or grab a snack.
2. Tailored to adult learners
On-the-job training is geared to adult learners – a specific type of student with specific needs.
Adults want relevance in training courses. When you design your content, try to answer the question that goes through every student’s mind at some point: “Why do I need to know this?” Explaining why your course materials and testing are important to the job will satisfy this need for relevance.
Adult learners are self-directed. Adults are busy, and they require the ability to work independently, at their own pace. Online courses are popular with adult learners because of their convenience; they are highly customizable for flexible schedules and prior knowledge base.
High-Res eLearning technology helps meet this need for independent learning because it is built in HTML5, utilizing HTML, CSS, and JavaScript to create an interactive environment that works across all types of devices. The images you use for your High-Res eLearning modules can originate as JPEG or PNG, which are then loaded into tiling technology that is compatible with Windows, Mac OS, Android, and iOS platforms.
3. Assessible
If you can’t measure outcomes, it’s a little like that sound nobody heard when the tree fell in the forest. That’s as true for business ROI as it is for teaching. Effective employee training programs must have measurable results.
Klixel8’s High-Res eLearning technology offers powerful backend analytics to provide insights into learner outcomes with heat mapping, scatter plots and other visual metrics.
Crafting Your First High-Res eLearning Course
We begin from the understanding that high quality, relevant images allow for more immersion into lessons for the vast majority of learners – and that more immersion results in faster and better knowledge acquisition and retention.
High-Res eLearning involves the use of extremely detailed photographs of up to 225 mega-pixels to contextualize your lessons. With no blurring or pixelation, a learner may zoom deeply into an image and pan to learn about component parts and tools present in a scene.
By keeping all of the individual aspects of a task contextualized within a scene – as opposed to clicking away through screen after screen of text – High-Res eLearning enables the learner to retain more of the information through the visual “memory anchor” provided by the photograph.
Lights, Camera, Action!
The following are practical steps to prepare your first High-Res eLearning course:
- Plan ahead for the day you photograph for your course. You will want to capture a logical sequence of pictures that help “walk through” the relevant section of your workplace. Make sure your employees are prepared for the photo shoot, particularly those who will be in frame! You may also want to clean the area.
- Camera requirements: To design your first High-Res eLearning course, you do not need the most expensive, state-of-the-art camera. You will, however, need a camera capable of several megapixels in order to maximize the depth of zoom in your images. Most digital cameras, and even some newer smartphone cameras, offer 7 megapixels or more. Ideally, you’ll want to use a camera with a minimum of 24 megapixels. Alternatively, you may consider contracting a professional photographer for a few hours who uses a camera with a minimum of 40 megapixels.
- Capture the full scene. Because one image sets the scene for a lesson about a workstation, procedure, or task, try to get a wide view with all the necessary instruments and work space visible. A wide-angle lens works best to capture a fuller view. For example, if you are designing your High-Res eLearning module around one machine in a factory setting, try to photograph the machine in the context of the broader shop floor. It is important to capture the entire context in which your employee will be working.
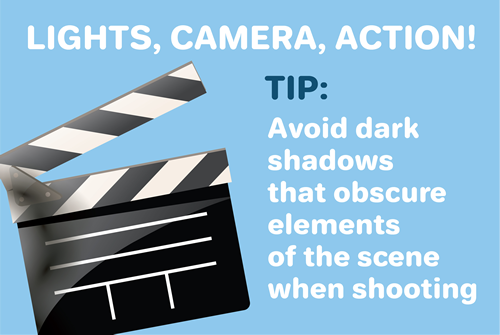
- Lighting – Avoid dark shadows that obscure elements of the scene. You want all aspects of a work area well-lit.
- Are you a people person? If your employee will be performing a task, consider including someone performing that work. People find images that have humans in them more memorable than unpeopled scenes, a 2011 study by MIT neuroscientists found.
Assembling Your Course Content
Now it’s time to put it all together. Try to think about your learner’s needs as you build the module. Does your learner require a more structured form of guided instruction, or freeform exploration?
1. Pick your images – Select the best contextual photos from your shoot. In the module, you will order them into a virtual walk-through sequence. Think of a guided tour of your facility, and how much exploration would be required at each “station,” starting from the front door or waiting room.
2. Map your scenes – Use the High-Res eLearning technology to map “hotspots” to all items identified for learning. These can be a large area like a desk or hallway consisting of thousands of pixels, or an individual element such as an instrument or gauge measuring only a few pixels across.
3. Link the hotspots you’ve mapped to additional materials. When a learner clicks the hotspots, information you enter will appear. This should include the name and purpose of an object, why and when things are used. It may also include multimedia content you already have, such as manuals or training videos, or you may choose to add new content like quizzes and links to external websites within the High-Res eLearning module.
4. Enable analytics – Believe it or not, you’re almost done! Once you have a module put into shape, it’s time to program in the analytics (either custom variables or SCORM compliant variables) that will be used to measure learning outcomes in the backend of your High-Res eLearning course.
5. Test and revise – Finally, test the course by running through it yourself, checking links and clicking on objects. Your more experienced employees can provide some of the most valuable feedback by taking the course and offering suggestions on subject areas that need expansion or clarification.
6. Prepare for liftoff – Now, make any final revisions to your module and launch. Congratulations!
A word on “final”: No training course is ever really finished. The beauty of launching your own training program is that you will build upon it. You are creating a base of completely custom, ever richer eLearning content, to use again and again with new hires.
Learn More.
Put the power of High-Res eLearning to work for you. To learn more about how to develop your first course and view a live demo, contact the Klixel8 team at https://klixel8.com/#live-demo or toll free at (833) KLIXEL8 (833.554.9358) today.